
Making blog
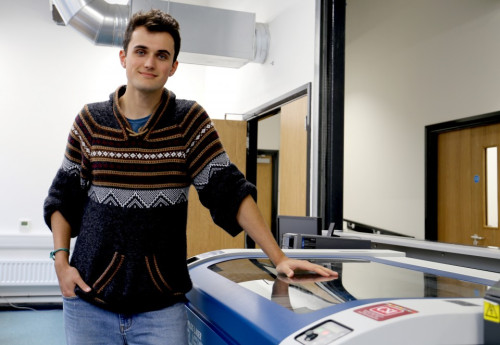
Little Inventors day at Access Space with Toni, Gareth, Martyn & John. Kit spread out over the tables. Jake took the photos.
We had a lot of fun on 30th May when we had the Little Inventors Day at Access Space. Here are a few comments from one of the makers!
We picked this idea because it's a problem we all struggle with on a daily basis! It's a great idea, but it's also applicable to more than just socks, this idea could be adapted to sort and match all sorts of objects.
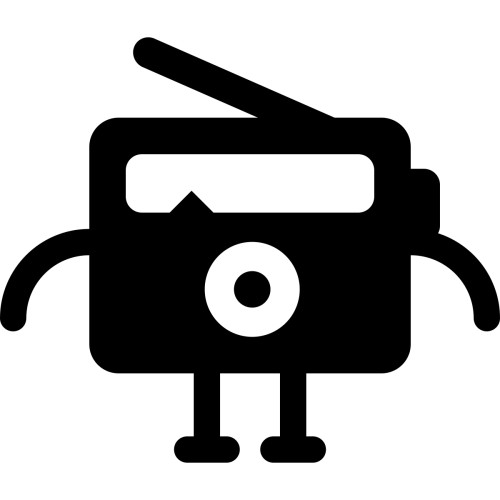
The Sock Matcher 5000 is being driven by a Raspberry Pi. The Pi Camera will detect when it sees a sock, then identify the sock colour and rotate the sorting plate to the assigned sock box. The Pi will then drive motors to move the sock conveyor belt so the sock drops through the funnel.
We've loved working on this project, there's so many different machines and processes being used to build The Sock Matcher 5000. We used the laser cutters and the 3D printers, even the vinyl cutter for the logo!
In our previous post, we left Mike and Paul on what seemed like a never-ending task of soldering together 36 diamond-shaped circuits, while Jackie and Zarino laser-cut acrylic and fabric for the dress.
We’d decided to make our own dress, because all the pre-made dresses we saw were either too patterned, or too flimsy, and we knew our 36 diamonds, the 3 battery packs, and all the wires connecting them, would be pretty heavy!
Anyway, after we showed the Little Inventors team our prototype dress, they suggested it would be a good idea to make a new one to fit a girl of Olivia’s age, so we took what we’d learned from our prototype and made a final version – this time with a simpler shape, an adjustable waistline, and only a single layer of fabric to make threading the wires through the buttonholes a lot easier.
On the inside of the dress, we added pockets to hold the three battery packs, and loops to route all of the wires through.
By then, all the diamonds had been finished, so we laid them out on the dress, to make sure we had good coverage, and made a note of the positions. We couldn’t resist the opportunity to try some of the lights out, powered by our bench power supply – and we were AMAZED by the brightness!!
Lastly, each diamond needed a sewn buttonhole to pass the connecting wire through, and a sewn-on velcro strip, to attach the diamond to the dress. An afternoon later, the dress itself was finished.
Threading everything into the buttonholes in the dress took a while, but by the end, we had a fully functional defence dress, that operated on both battery power, and from the mains, with a button in the sleeve to turn the lights on and off.
Fast forward a few days, and the dress had been couriered to Newcastle, to appear in the Great Exhibition of the North. After a few last-minute tweaks (it turns out our dress was a little more delicate than a production model would be!!) it was TIME TO SHINE :-D
Everyone was amazed by the dress, and it was great to see it alongside other inventions people had made at the exhibition.
In our last blog post, we covered some of the backstory of who we are, and how we decided to make Olivia’s “Defence Dress” a reality, using a LOT of high-intensity LEDs.
The next step was to put together a prototype. We used CAD software to design three diamond shapes, roughly the size of A5, A6, and A7 pieces of paper, with little sets of holes ready to poke our LEDs “legs” through. We figured, we could leave the LEDs exposed on the front, and then solder them up, with resistors and a bit of wire, on the back.
Using the laser cutter at DoES Liverpool, we cut our first diamond shape out of some red mirrored acrylic, and started wiring up the LEDs through the holes. You can see a photo of the red prototype attached to this post!
It was amazing – it worked! But we noticed a few improvements we could make. First off, soldering so close to the back of the mirror acrylic caused burn marks to appear in the reflective metal layer, which was a bit messy. But more worryingly, the metal was conducting the electricity we passed through the LEDs, causing a short circuit.
So we decided to cut a back and a front, separately – the LEDs were soldered onto a plywood backing board, and they then poked through holes in the mirrored acrylic front. The plywood backing kept the diamonds fairly light, and the separate acrylic front meant we avoided any short circuit issues.
Since each colour of LED needed a slightly different current, we needed different values and numbers of resistor in the circuits on each colour of diamond. Complicated stuff!
While Mike and Paul led on the soldering, Jackie and Zarino used the laser cutter, again, this time to cut a dress pattern out of white fabric. We’d searched high street stores for white dresses, but everything was made out of much too flimsy fabric for what we needed. Handily, DoES is right in the middle of Liverpool’s “Fabric District”, so we weren’t short of places to find fabric for our dress!
Next up: We turn the lights on, and face a tangle of wires.
Hi! We’re a group of makers who do cool things with electronics, textiles, and software in our spare time, at a makerspace called DoES Liverpool.
Earlier in 2018, we made a set of light-up costumes for a Liverpool samba drum band, using microbits and “neopixel” LEDs to flash coloured lights above each drummer in time with their individual beat.
So, naturally, when we heard about Little Inventors, and saw Olivia’s “Defence Dress” idea, we knew we *had* to make it a reality.
Even though we were used to working with neopixels—the individually-controllable multi-colour LEDs that come on strips—once we’d carefully read Olivia’s idea, we realised we really didn’t need LEDs that changed colours. Instead we could pick a set number of colours, and then focus on making them as BRIGHT as we possibly could!
We worked out a way of translating Olivia’s drawing into the real world – there would be three different sizes of “diamond”, each with either 16, 9, or 4 LEDs. Just like Olivia’s drawing, there would be four colours of diamond (red, yellow, purple, and green) and each diamond would have coloured LEDs to match. We looked online for the brightest “high-intensity” LEDs we could find, and ordered them, to arrive a few days later.
Princess Rescue had lots of details in the design drawing by Nina. I used a drilled ping-pong ball to create the round face shape and added details using epoxy clay Milliput. For her strong hair I mixed in strands of steel cable with the hair-like wool fibre, adding a grapple hook onto one of the strands so that she could hang from the window. She has strips of facecloth tying her hair up as Nina had the idea that she could use these as towels. I used optic fibre connected from under the house structure, through her body to make her eyes light up. The dress is made up of sections of plastic bag so that it would be waterproof. I designed the rescue snack labels in Photoshop and printed them out, gluing them onto bake-able clay shapes. The feet are also made from bake-able clay and painted silver to give them a heavy weight look and the arms have knitted sleeves to make them extra comfortable for the heated life saving hugs!
The Robot Water Blaster hose is made from a plastic pipe tube. It has a thick wire through it so that it stays in position. I originally used gaffer tape to cover the tubing as it was a similar texture to real hose pipes, however, it started to peel off the plastic tube so I needed to find a different material. I ended up using pipe cleaners, which give the hose a bit of character and make it fun and child-friendly. The end of the hose is a cake icing nozzle and I used optic fibres and clingfilm to make it look like there is water coming out of the spout. The shoes are made from oven bake-able clay, with wooden dowel legs that have rubber tubing around them. The look of the fire inside the house is achieved by a fan blowing tissue paper and sweet wrappers. I used a self build RGB controller kit to control the flickering of the lights and added coloured lighting gels to make them orange. I added a flashing blue light onto the design as I thought that it may need this when dashing through traffic!!
I've bought a cup and a bowl, measured up a spacer so they can be stuck together and made a hole for the straw.
Few challenges finding the right adhesive but I am happy with the final product.
I used a steel bowl along with a thermos type cup as well as a steel straw. This means its all washable and no plastic straws to throwaway. The cup will also keep your drink cold due to being double layered. I will definitely be using this to watch films.
What were we were trying to make?
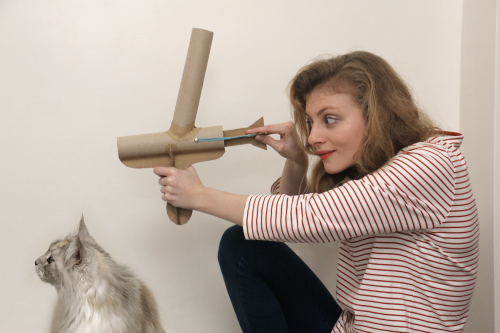
We’re trying to make an invention into a real prototype, the invention we’re going with is a Boomabee, essentially a frisbee that converts to a boomerang in a very rainbow stylee. How functional does it need to be? This isn’t about making it look like the drawing, it’s about taking it a step further into something shiny and crafted. Given the invention we have chosen, I suspect they won’t be throwing it around in the gallery but it looking good, convincing and crafted is a must.
Getting Started:
First, we met up in a coffee shop and talked through the options of what was feasible to make together. Having decided on the boomabee (sadly lacking any closet pneumatic experts) we started to think through how on earth it could work. We figured starting with a boomerang to end up with a frisbee was more logical as boomerangs are hard and need certain aerodynamics a lot less predictable than a frisbee’s. We went on a boomerang hunt in Carlisle , which it turns out has a chronic shortage of ‘good’ boomerangs, but found some cheap multipack ones, and had a fair few to play with. At the park we figured out if they/how worked, despite their awful-ness of of the ones we had bought they did seem to, as did a few variations of combined boomerangs We made use of the surplus of frisbees to chop them up and play with the kids original idea of how a boomabee would work, and also combined multiple frisbees in various ways. The most convincing approach, that looks feasible and aligned to the kids vision is stacked boomarang slices with a pivot pin (like a book screw), that can then fan out into a frisbee. We’ve played with this a little further today, figuring out that if you run with a 103 degree angle and incorporate the rounded ends that often feature on boomerangs anyway, you end up with a nearly full coverage frisbee. This would need to not be simply a layering of 8 identical boomerang outlines, but actually layers that vary to enable the contouring of a boomerang’s airfoil. How we figure that out is the next step, and could be done digitally or physically - there’s lots of thigiverse boomerangs, and CNC diagrams online ... https://m.wikihow.com/Make-a-Boomerang https://www.thingiverse.com/thing:1060139
More prototyping:
Toni came up with a development of the above models which in essence is works with a ‘3 pronged boomerang model” - the idea is that design is made of two separate 3D printed halves which clip together. These can the unattached and ‘swivel’ so revealing fabric which stretches in between. This description hardly does the idea justice.
Going Digital:
The next thing that happened was that ben had a good excuse to sit down at the 3dprinter and print lots and lots of mini boomarangs. These made great toys and are good fun to play with. What he was trying to do was create the 3d version of Toni’s design, first making a 3 pronged boomerang, and then making a version that was hollow which could fit some fabric, but these were super small. We then hooked up with Stuart, with his huge amount of design and making experience. He pointed out that we didn’t need the fabric sketched out a design on the back of an envelope (literary). The next day we started to make the digital files, laser cut two copies of the design and also printed the rainbow. By this point it was really coming together. Looking like the Boomabee, Finishing Up:
Once we had a completed the boomabee, Ben went home and spent some time creating a stand and documentation. Then it all went in the post to newcastle. We were really happy with how the Boomabee turned out. And Stuart and Ben had a bit a of play outside when it completed. They kept it short since it was raining, and didn’t want the final product to break before we got it to the Great Exhibition of the North!
This invention would really help people who can't use heavy hedge trimmers. I've had a go at making it in cardboard. I looked online for pictures and I modelled the shape on a diplodocus and used a chainsaw for the tail and secateurs for the robots mouth. I added to Oliver's design by adding caterpillar tracks so that the hedge cutter doesn't get stuck in mud. I started with a pre-made box and built the grinding stomach by cutting loads of cutting disks and threading them on to a tube. I made the tracks by peeling the top layer of paper of the corrugated card to give it the texture of a caterpillar tread. Oliver's robot has two heads I like how the secateurs look like a mouth and and eye of the robot.

Here are some pictures of how I made a cardboard prototype of the phoenix drone. I added red wings that look like flames and created a compartment to carry the medical supplies. I used an old Jesmona sweets box for the wings as it is a vibrant red colour.